
I’ve been working on an Android app, that was in the early demo stage and not released to the Play Store yet. After a while I found myself building, signing, uploading the app to Google Drive and then writing an email with all the changes, to everyone who was involved in this project. The project was outside the company R&D and didn’t use existing CI/CD, so I needed a quick, easy and free way to release the app. Fortunately, GitLab has a simple and free CI/CD system that is available in private repositories. In this article, I will describe my release process.
Goal
The goal is that when I make a push to some branch, it will trigger the following pipeline:
- Build the app and run a Lint check.
- Run unit tests.
- Run release build and sign the app with real keys.
- Upload the app to Dropbox.
- Send an email with a download link and a list of the latest changes.
- We will achieve this by adding a GitLab CI file (.gitlab-ci.yml) to our project. This file is the configuration for our CI/CD pipeline.
TL;DR
- To see a sample project — go to chapter 12.
- Chapters 1–9 describe the GitLab CI file.
- Chapter 7 is about Dropbox API and Zapier webhook.
- Chapter 10 explains how to use changelogs and templates.
- Chapter 11 goes through the python deploy script.
1. Image
Our CI job runs inside a Docker image. There are two main approaches.
- Use a base image with Java (openjdk) and install the Android SDK when the job starts running. There is a good article from GitLab, that explains how to achieve this.
- Use an image that already has the latest SDK installed. There is a good image that has the latest Android SDK and some popular libraries pre-installed, which makes the Gradle build faster.
Downloading the image, with everything installed, is a bit faster than running the SDK install process every time (unexpectedly only ~5% faster). Obviously, we will use the second approach with jangrewe/gitlab-ci-android image. Let’s add this at the beginning of our .gitlab-ci.yml file:
image: jangrewe/gitlab-ci-android
2. Cache
Caching Gradle folder between builds may reduce building time. When we add cache to our builds, each cached job will download and extract the cache at the beginning and upload the cache at the end. Sometimes the download-extract-archive-upload cache process may spend more time than it saves. So it’s possible that after making the build 30 seconds faster, it will make the whole job a minute longer. I suggest to test the pipeline with and without cache and compare the times. Add this to .gitlab-ci.yml file:
before_script:
- export GRADLE_USER_HOME=$(pwd)/.gradle
- chmod +x ./gradlew

cache:
  key: ${CI_PROJECT_ID}
  paths:
  - .gradle/
The export GRADLE_USER_HOME is for Gradle, to use our work folder for storing Gradle files. Without it, the .gradle folder will not include everything we want to cache. Changing cache key will drop the previous cache, so for our purpose, we will use ${CI_PROJECT_ID} which will stay consistent between jobs.
3. Stages
Our pipeline order is build-test-release-deploy. Add this to .gitlab-ci.yml file:
stages:
- build
- test
- release
- deploy
This will be the order of the jobs. Jobs that are in the same stage, will run in parallel. Jobs from different stages will depend on the previous stage.
4. Build
In this stage, we will run two jobs in parallel — build and lint. Before testing and deploying, we want to be sure that our build is not broken and there are no lint errors.
lintDebug:
  stage: build
  script:
  - ./gradlew -Pci --console=plain :app:lintDebug -PbuildDir=lint

assembleDebug:
  stage: build
  script:
  - ./gradlew assembleDebug
These two jobs are pretty simple, but any error in build/lint will stop this and all the other jobs in the pipeline.
- Test Now when the app has no build errors, we will run some unit tests.
testDebug:
  stage: test
  script:
  - ./gradlew -Pci --console=plain :app:testDebug
It’s also possible to run UI tests on Android emulator, inside a Docker image, but it takes too much time.
6. Release build and Sign
This is the stage where we build and sign our app. We want a real release build with an app that is signed with a real key. The problem is that we don’t want to put our key inside the repository. To avoid that, we will use GitLab CI/CD variables. We will store our secret keys and passwords inside the variables and they will be accessible only for our job runners. It’s easy to store the keystore passwords and alias, but what are we going to do with the keystore file? We will store it as base64 string.
base64 -w 0 ~/.android/debug.keystore
This will copy the result to clipboard:
base64 -w 0 ~/.android/debug.keystore | xclip -selection clipboard
Now that we have our base64 string, let’s put it inside CI/CD variables. In GitLab project, go to Settings -> CI / CD -> Environment variables (expand). Add your keys and passwords. Make sure that your variable names match the ones in the picture so that our next scripts will work properly.
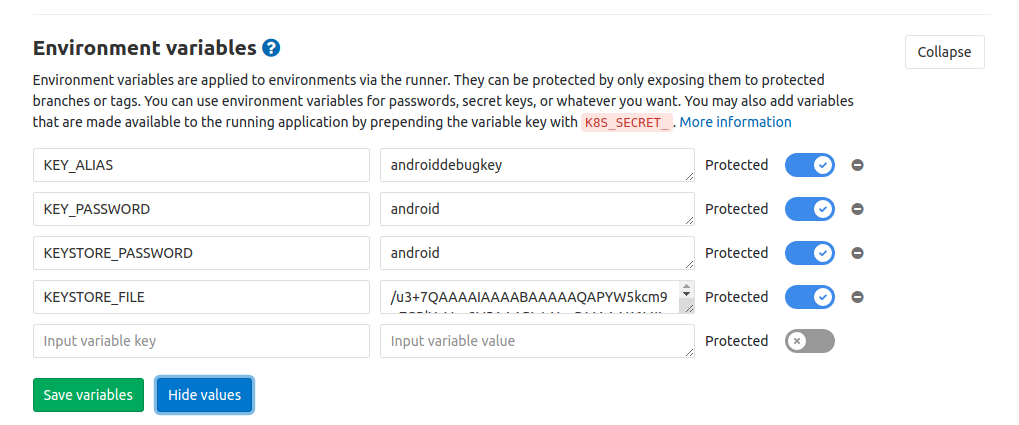
Protected variables will be used only in protected branches.
Now that we have the keys, our release job will decode the base64 back to keystore file and will run gradlew assembleRelease with the keys.
assembleRelease:
  stage: release
  script:
  - echo $KEYSTORE_FILE | base64 -d > my.keystore
  - ./gradlew assembleRelease
    -Pandroid.injected.signing.store.file=my.keystore
    -Pandroid.injected.signing.store.password=$KEYSTORE_PASSWORD
    -Pandroid.injected.signing.key.alias=$KEY_ALIAS
    -Pandroid.injected.signing.key.password=$KEY_PASSWORD
  artifacts:
    paths:
    - app/build/outputs/apk/release
    - CHANGELOG
    - TEMPLATE
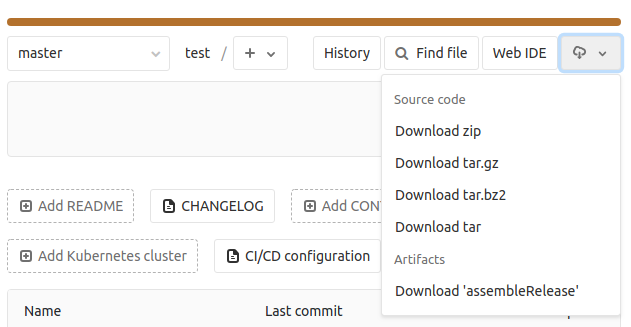
The artifacts are passed to the next job (upload) and also available for download from GitLab UI.
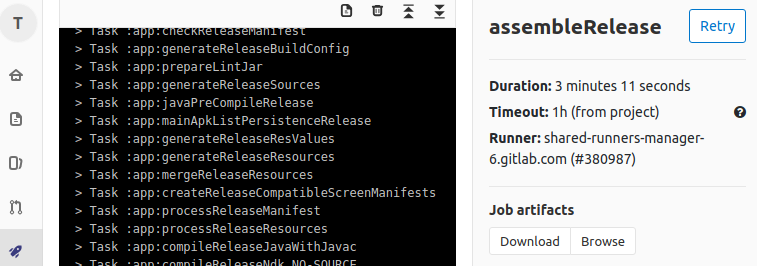
Inside the job (assembleRelease):
In the project main page:
7. Dropbox and Zapier setup
In this stage, we will generate Dropbox token and Zapier email hook.
Dropbox
We will need Dropbox access token in order to upload and share our files. If you don’t have one, follow these steps:
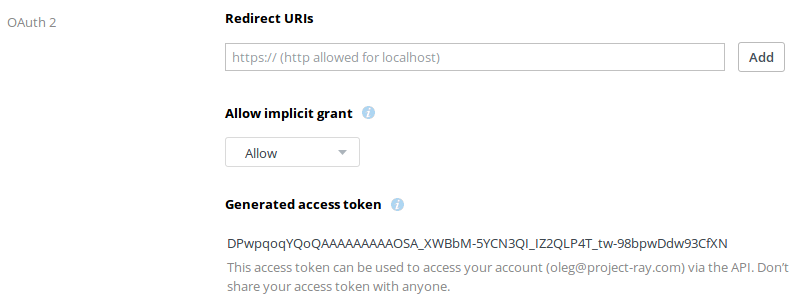
Go to Dropbox Developers, click on Create your app, choose Dropbox API, choose App folder and enter a name for your build folder, something like best-app-ever-builds. Now, in your app page, go to Generated access token and click Generate. This token will be used by our upload script. Everything that is uploaded with this token will go to the app (best-app-ever-builds) folder.
We will use Zapier with Gmail integration for emails. Go to Zapier Home and click the Make a Zap! button. Create new webhook (Webhooks by Zapier), choose the Catch Hook option and then click Continue. Copy the URL provided by Zapier and save it — this URL will be used in later stages. Now Zapier will wait for our POST and the data will be used to send emails (it’s ok to use mock values, no need for real emails and content). It’s important to send the POST request with the following JSON because the other scripts rely on this structure:
{
 "to": "me@myorg.com",
 "subject": "New App Version 1.0005",
 "body": "App is ready\nClick download"
}
Send a POST request, with this JSON, to the URL that was given by Zapier. Let’s say your URL was https://hooks.zapier.com/hooks/catch/12345/abcd/, the cURL will look like this:
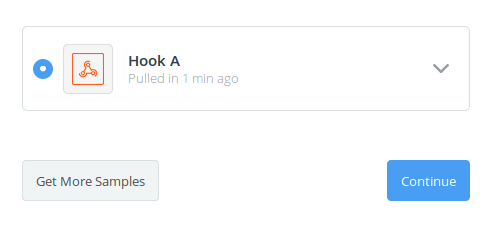
Now click Ok, I did this and Zapier will show you the incoming hook. Select it and click “Continue”.
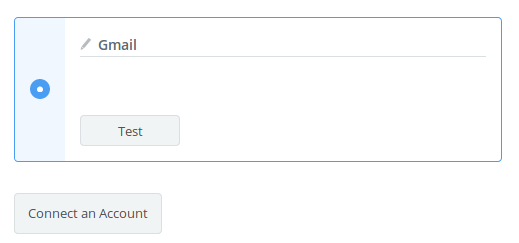
We’ve got the hook, now we need the action step. Click the message that suggests to add the action step, select Gmail and choose to Send Email. Zapier will ask you to connect your account — do it and then check that it’s working with the Test button.
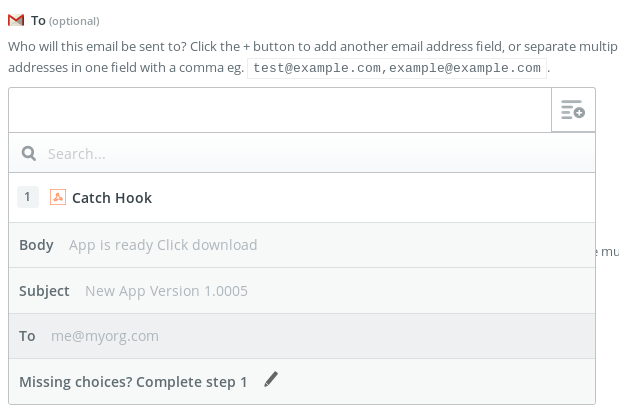
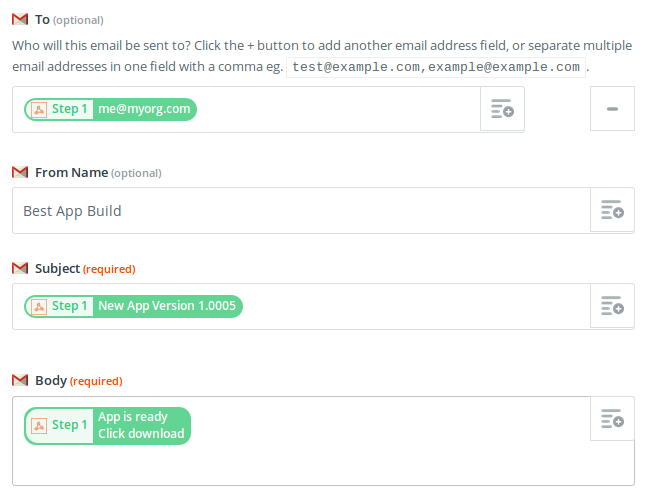
Click the Continue button and fill the fields To, From Name, Subject, Body. Select the data that was received from our POST inside To, Subject, Body fields:
Write whatever you want in the From Name field. My setup ended up looking like this:
Hit the Continue button and Send To Test Gmail. If you get the green message — everything is ok (you should also receive an email to provided address). Hit Finish, name your Zap and turn it on. Now let’s make the real test — use your Zap URL to run the cURL request (or postman) again.
Make sure you received an email from your connected Gmail account and we are ready for the next step.
8. Add Dropbox and Zapier variables
Now that we have our Dropbox token and Zapier webhook, we will add them to CI/CD variables.

9. Deploy
The last job will be a deploy script that relies on previously saved artifacts, values and template files.
deployRelease:
  image: python:3.5.2
  stage: deploy
  script:
  - pip install requests
  - git clone https://github.com/mega-arbuz/apk-release-deploy.git
  - python apk-release-deploy/deploy.py
    --release.dir=app/build/outputs/apk/release
    --app.name=BestAppEver
    --dropbox.token=$DROPBOX_TOKEN
    --dropbox.folder=release
    --changelog.file=CHANGELOG
    --template.file=TEMPLATE
    --zapier.hook=$ZAPIER_EMAIL_HOOK
    --email.to=$EMAIL_TARGET
  cache: {}
This job uses python:3.5.2 image because we just want to run a simple python script that will do all the work — no need for the large Android image. The cache, from previous jobs, is disabled because we don’t run Gradle builds here. The first step is to install requests module (you can change the image to a python image that already has requests installed), then we clone the deploy script that will do the APK upload and email sending. We will dive into the script in the next stage, right now let’s prepare the required arguments.
- -
release.dirpath to app release directory that was saved in artifacts. - –
app.nameapp name that will be used in emails. - –
dropbox.tokenuse$DROPBOX_TOKEN CI/CDvariable here. - –
dropbox.folderdropbox folder name for app builds. - –
zapier.hookuse$ZAPIER_HOOKCI/CD variable. - –
email.tolist of recipients, use$EMAIL_TARGET CI/CDvariable. - –
changelog.filepath to CHANGELOG file with a special format — see next chapter about formatting this file. - –
template.filepath to TEMPLATE file with email template — see next chapter about formatting this file.
The paths in the job are matching my project structure from the GitLab sample project. Visit the project for a better understanding of how to customize this.
The .gitlab-ci.yml file is completed and the result should look like this:
10. CHANGELOG and TEMPLATE
The deploy script uses CHANGELOG and TEMPLATE files for email composing. These files are also documented in the deploy script GitHub.
CHANGELOG
This file is used for storing app changes. The deploy script will extract the latest version change and use it in the email. Each version change is separated by ## and all the lines starting with # are ignored, so you can use the # char for version number marks, which will make the file readable.
# Version 1.05
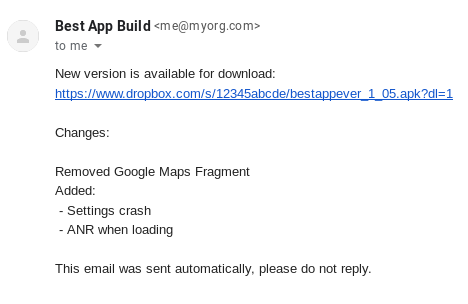
Removed Google Maps Fragment
Added:
- Settings crash
- ANR when loading
##
# Version 1.04
Added Google Maps Fragment
Fixed:
- Settings crash
- ANR when loading
##
The script will ignore the # Version 1.05 line and will extract the content before the first ##. This content will be used inside the email.
There is another way to make auto changelog — use GitLab API and extract the relevant tickets from commit messages. This is too much for one post, I will cover this in a different article.
TEMPLATE
The template file is used for composing the email. We want to send some information about the app, but our email format preferences may be different. Use the template file with the following variables to compose the email:
{app_name}will be replaced with the real app name.{app_version}will be replaced with app version from this build.{app_download_url}will be replaced with the Dropbox download URL.{change_log}will be replaced with the changes extracted from the CHANGELOG file. Email subject and body are separated with#subjectand#bodylines. My final TEMPLATE file looks like this:
#subject
New {app_name} release, version {app_version}
#body
New version is available for download:
{app_download_url}

Changes:
{change_log}

This email was sent automatically, please do not reply.
This is how the email, with all previous configuration, will arrive. After the pipeline is finished, we will get this email:
11. Deploy Script
Now when our CI/CD works, let’s see what do we have in the deploy script.
Full Script
The full script is available in this GitHub project.
App Version and File
Before we send anything, we want to know the version of our build and the path to the APK file. This information is stored in the output.json file, generated in the release directory. Luckily, we received the path to release directory from previous steps.
Uploaded File Name
We want our file name to be safe (without spaces and dots) and have some useful info, like app name and version. For an app called “Best App Ever” and build version 1.05, we will get the name: bestappever_1_05.apk.
Dropbox Upload
Dropbox supports add and overwrite upload modes — we will use the overwrite mode, just in case. There is also an issue with getting shareable URLs — if the file was shared earlier, the request will return an error, which means that we have to make another call to check if the file was shared. This is a bit dangerous because our overwritten file will have the same URL as the old one. In order to avoid all these issues, the script will send a delete request at the beginning, so that we start the process knowing that there are no files with the same name.
We configure our Dropbox request arguments: mode=overwrite, autorename=True and requested_visibility=public. The upload method constructs the file path, using dropbox.folder argument and app name, sends a delete request, uploads the file and sends a request for shareable URL. The returned URL is taking us to Dropbox download page — we don’t want this, so we change the last digit from ‘0’ to ‘1’, which will take us to direct download.
Changes
We get the changes from the CHANGELOG file. The process was described in previous steps so here is the code:
Compose Email
Now we have our app name, app version, download URL and the latest changes. All this information goes to our TEMPLATE file. The result will be — subject and body for our email.
Send Email
This one is simple — we use our data structure from the Zapier webhook setup.
12. Resources
GitLab project with everything described in this article.
https://gitlab.com/arbuz/android-ci-cd
GitHub project with the deploy script.